Drop your photo here
or click to browse
Supports JPG, PNG, WebP - Max 50MB - 100% Private
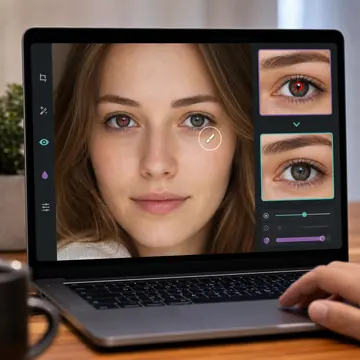
Tip: Click on red eyes to remove them. Use "Auto Detect" for automatic removal, or manually click on each red eye. Adjust brush size for precision.
Download Your Photo
How to Remove Red Eyes
Upload Photo
Select or drag & drop your photo with red eyes
Click on Red Eyes
Click directly on red eyes or use Auto Detect
Download
Save your corrected photo instantly
Precise Control
Adjustable brush size for accurate red eye removal
Auto Detection
Automatically finds and fixes red eyes
100% Private
Photos never leave your device
Instant Results
See changes in real-time
What Causes Red Eye in Photos?
You know that creepy demon-look people get in flash photos? That's red eye. It happens when your camera flash bounces off the blood vessels in the back of someone's eye. The darker the room, the worse it gets - because pupils are wide open, letting in more light.
Our Red Eye Remover fixes this in seconds. Just upload your photo, click on the affected eyes (or let auto-detect find them), and the tool replaces that red glow with natural-looking dark pupils. The result looks like red eye never happened.
Why Use Our Red Eye Remover?
Two Modes: Auto & Manual
Let the tool auto-detect red eyes, or manually click on them for precise control. Works great either way.
Natural-Looking Results
We don't just paint black circles. The tool preserves eye detail and creates realistic-looking pupils.
Perfect for ID Photos
Passport and visa photos can't have red eye. Fix it before submission to avoid rejection.
Completely Private
Your photos stay on your device. No uploads, no servers, no privacy concerns.
Tips for Best Results
Zoom in for precision - For small faces or group photos, zoom in before clicking on eyes for more accurate targeting.
Adjust brush size - Use a smaller brush for children or people far from the camera, larger for close-up portraits.
Auto-detect first - Let the tool try to find red eyes automatically. You can always switch to manual if it misses any.
Check both eyes - Sometimes one eye has stronger red eye than the other. Make sure both look natural before saving.
For pets, be patient - Animal eyes (often appearing green or yellow in flash photos) may need manual adjustment.