
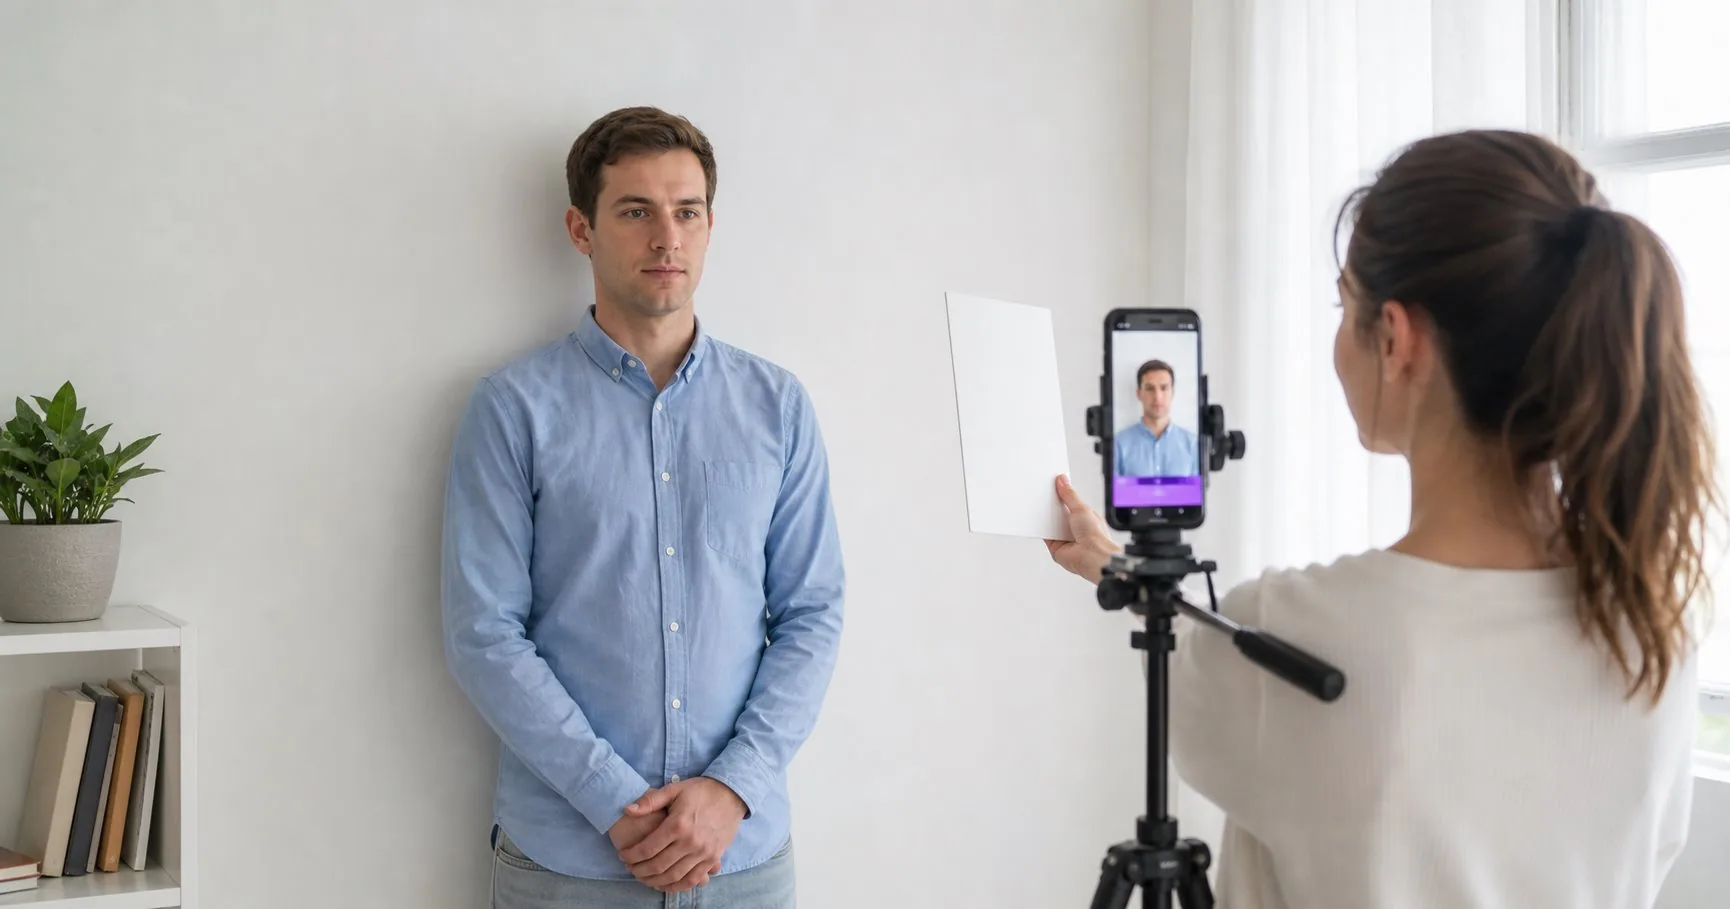
Lighting is the part of passport photos that people underestimate most. They focus on size, background color, and clothing, but the photo often fails before cropping even begins because the face is unevenly lit or the wall has a visible shadow. A passport photo is not a portrait. It should be plain, clear, and easy for an application system or officer to inspect.
The good news is that you do not need a studio light. In most homes, the best passport photo lighting is soft daylight from a window. The trick is knowing where to stand, where to place the camera, and how to stop your head from casting a dark shape on the background.
The Best Light: Soft, Bright, and Indirect
Direct sunlight is usually too harsh. It creates bright spots on the forehead, dark shadows under the nose, and strong contrast on one side of the face. A cloudy day near a window is often better than a sunny day. If the sun is hitting the wall directly, wait until it moves or use a different room.
Stand facing the window or slightly angled toward it. The face should be evenly lit from the front. If the window is on one side, the other side of the face may become too dark. You can fix that by turning your body more toward the window or by placing a white sheet of paper, foam board, or light-colored wall on the darker side to bounce light back.
Move Away From the Wall
Many passport photo shadows happen because the person stands directly against the wall. When the light comes from the front or side, the head casts a shadow behind it. Move at least one step away from the background. This gives the shadow room to fall lower or become softer. It also makes background cleanup easier.
If your room is small, even a little distance helps. Do not lean on the wall. Keep shoulders relaxed and stand straight. A plain white or off-white wall is ideal, but a light gray wall can sometimes work if the final tool replaces or cleans the background. Avoid textured walls, curtains, door frames, shelves, and visible corners.
Camera Position Matters as Much as Light
Place the camera at eye level. If the camera is too high, the forehead looks larger and the chin drops. If it is too low, the jaw and nostrils become more prominent. Both angles can make the photo look less like a proper ID image. The easiest setup is a phone tripod. If you do not have one, stack books on a table and use the phone timer.
Use the rear camera when possible. Front cameras are convenient, but they often use wider lenses and aggressive processing. The rear camera usually gives sharper detail and more natural facial proportions. Ask someone else to take the photo or use a timer so your shoulders stay level and your arms do not appear in the frame.
How to Check for Bad Shadows
Before uploading, zoom into the photo. Look at the wall around the hair and shoulders. A faint soft shadow may be fixable, but a dark outline behind the head is risky. Also check the eyes. If one eye is much darker than the other, the face is not evenly lit. Check under the chin, around the nose, and beside the ears.
Do not use beauty filters to fix lighting. Filters can smooth skin too much, change natural color, or sharpen the image in an unnatural way. Passport and visa photos should show your real appearance. It is better to retake the photo in better light than to edit aggressively.
Simple Home Lighting Setup
- Choose a plain wall near a window.
- Turn off strong overhead lights if they create yellow color or eye shadows.
- Stand one step away from the wall.
- Face the window or angle slightly toward it.
- Place the phone at eye level, about chest-to-head framing distance.
- Use the rear camera and timer, or ask another person to take the photo.
- Take at least five photos and choose the sharpest one.
This setup works because it solves the main problems at once: even facial light, reduced background shadow, straight camera angle, and enough space for cropping.
What About Night Photos?
Night photos are harder but not impossible. Use two soft light sources if you can, one on each side of the camera. Avoid a single lamp from above because it creates deep shadows under the eyes. If you only have one lamp, place it in front of you and slightly above eye level, then soften it by bouncing it off a white wall or using a lampshade. Never point a harsh bare bulb directly at the face.
Phone cameras also struggle at night because they raise ISO and smooth details. If your passport or visa application is important, daylight is safer. A daytime retake usually gives a cleaner result than trying to repair a noisy night photo.
Background Color and Lighting Are Connected
A wall can look white in real life but gray in a photo if the room is dim. It can also look yellow if the light is warm. That is why good lighting improves background quality. A bright, evenly lit wall gives editing tools a cleaner base. Background replacement works better when the hair and shoulders are separated clearly from the wall.
If your background is not perfect, VisaPicPro can help prepare a clean passport-style output. But the better your original lighting, the more natural the final result will look. AI tools are strongest when they refine a good photo, not when they have to rescue a poor one.
Clothing and Hair Tips for Better Lighting
Wear clothing that contrasts with the background. A white shirt against a white wall can make the shoulders disappear. Dark navy, charcoal, medium blue, or muted colors usually work well. Avoid shiny fabrics because they reflect light and can create bright patches.
Keep hair away from the eyes and avoid heavy shadows across the forehead. If you wear glasses, watch for reflection. Move your face slightly, adjust the light, or remove glasses if the rules for your document allow or require it. The eyes must be clearly visible.
Upload and Check Before You Submit
After choosing the best photo, upload it to VisaPicPro and select the correct country or document preset. Review the crop, head position, and background. If you need only one standard file, use the free daily download. If you need a sharper export, 300 DPI print sheet, multiple paper layouts, or both digital and print files, use the Pro export.
This workflow keeps the process practical. You handle the photo at home, the tool handles the formatting, and you avoid common rejection triggers before submitting your application.
Final Lighting Checklist
- No direct sunlight on the face.
- No dark head shadow on the wall.
- No strong overhead shadow under the eyes.
- Camera at eye level.
- Face sharp and natural, not filtered.
- Plain background with enough contrast around hair and shoulders.
- Original high-quality file uploaded, not a compressed screenshot.
If your lighting passes this checklist, the rest of the process becomes much easier. A clean source photo gives you a cleaner crop, a more natural background, and a better print. That is the real secret of passport photo quality: fix the light before you fix the file.
Ready to Check Your Photo?
Upload your best-lit image to VisaPicPro, choose the right country size, and download a standard or HD print-ready passport photo.
Upload Photo